设置 CI
介绍
🌐 Introduction
Playwright 测试可以在任何 CI 提供商上运行。本指南介绍了使用 GitHub Actions 在 GitHub 上运行测试的一种方法。如果你想了解更多信息,或如何配置其他 CI 提供商,请查看我们详细的持续集成文档。
🌐 Playwright tests can be run on any CI provider. This guide covers one way of running tests on GitHub using GitHub Actions. If you would like to learn more, or how to configure other CI providers, check out our detailed doc on Continuous Integration.
你将学习
🌐 You will learn
设置 GitHub Actions
🌐 Setting up GitHub Actions
当使用 VS Code 扩展 或 npm init playwright@latest 安装 Playwright 时,你可以选择添加一个 GitHub Actions 工作流。这会在 .github/workflows 文件夹中创建一个 playwright.yml 文件,里面包含了运行测试所需的一切,以便在每次向主分支或 master 分支的推送和拉取请求时运行测试。该文件的内容如下:
🌐 When installing Playwright using the VS Code extension or with npm init playwright@latest, you are given the option to add a GitHub Actions workflow. This creates a playwright.yml file inside a .github/workflows folder containing everything you need so that your tests run on each push and pull request into the main/master branch. Here's how that file looks:
name: Playwright Tests
on:
  push:
    branches: [ main, master ]
  pull_request:
    branches: [ main, master ]
jobs:
  test:
    timeout-minutes: 60
    runs-on: ubuntu-latest
    steps:
    - uses: actions/checkout@v5
    - uses: actions/setup-node@v5
      with:
        node-version: lts/*
    - name: Install dependencies
      run: npm ci
    - name: Install Playwright Browsers
      run: npx playwright install --with-deps
    - name: Run Playwright tests
      run: npx playwright test
    - uses: actions/upload-artifact@v4
      if: ${{ !cancelled() }}
      with:
        name: playwright-report
        path: playwright-report/
        retention-days: 30
工作流执行以下步骤:
🌐 The workflow performs these steps:
- 克隆你的代码库
- 安装 Node.js
- 安装 NPM 依赖
- 安装 Playwright 浏览器
- 运行 Playwright 测试
- 将 HTML 报告上传到 GitHub UI
要了解更多信息,请参阅《理解 GitHub Actions》。
🌐 To learn more about this, see "Understanding GitHub Actions".
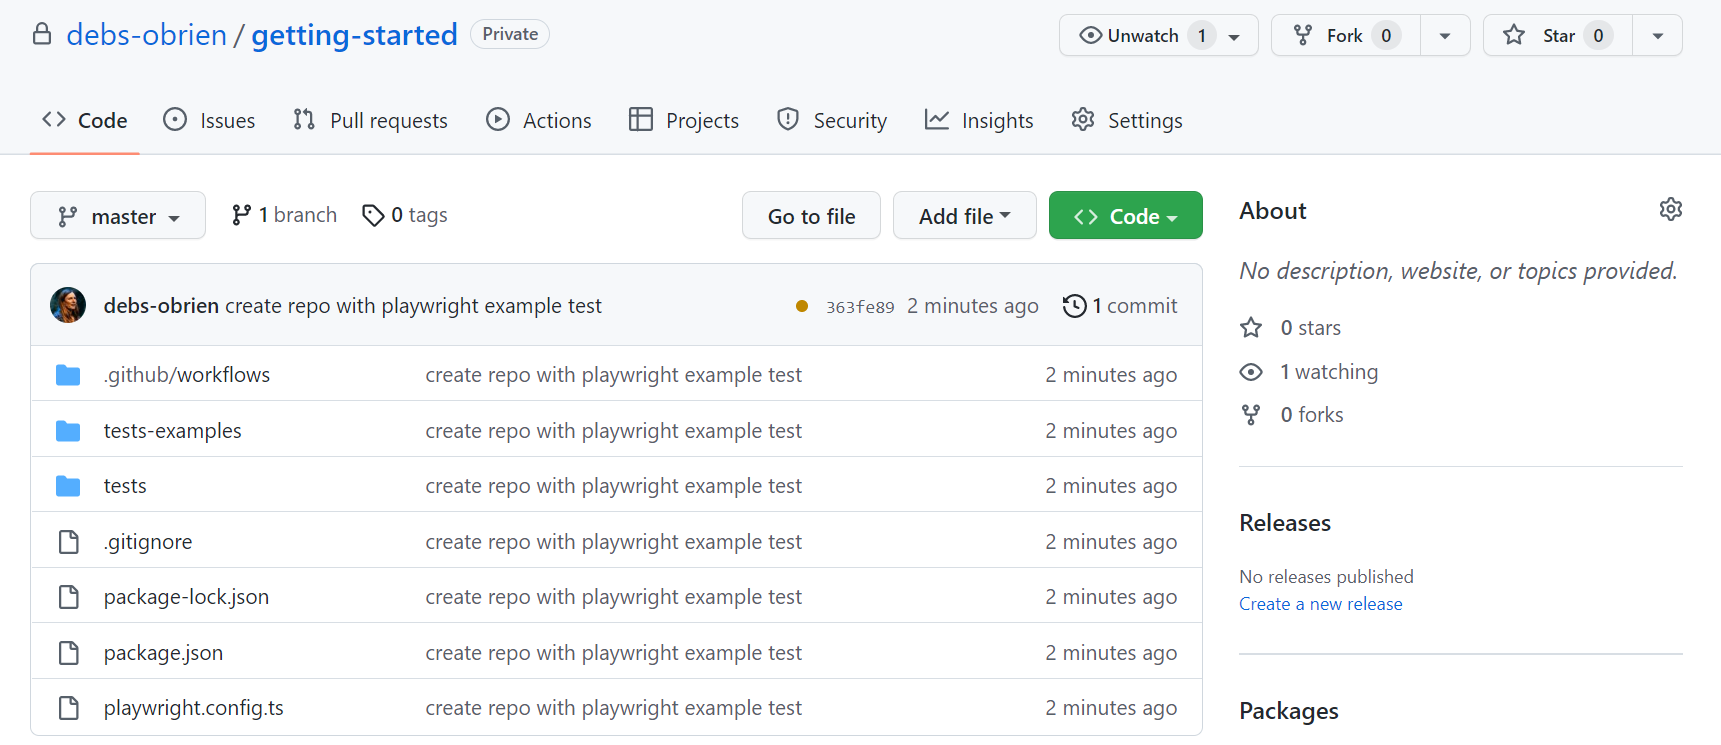
创建 Repo 并推送到 GitHub
🌐 Create a Repo and Push to GitHub
一旦你设置好你的 GitHub Actions 工作流,接下来你需要做的就是 在 GitHub 上创建一个仓库 或将代码推送到已有的仓库。按照 GitHub 上的说明操作,并不要忘记使用 git init 命令 初始化一个 git 仓库,以便你可以 添加、提交 和 推送 你的代码。
🌐 Once you have your GitHub Actions workflow setup, then all you need to do is Create a repo on GitHub or push your code to an existing repository. Follow the instructions on GitHub and don't forget to initialize a git repository using the git init command so you can add, commit, and push your code.
打开工作流程
🌐 Opening the Workflows
点击 操作 标签查看工作流程。在这里,你可以看到你的测试是通过还是失败。
🌐 Click on the Actions tab to see the workflows. Here you see if your tests have passed or failed.
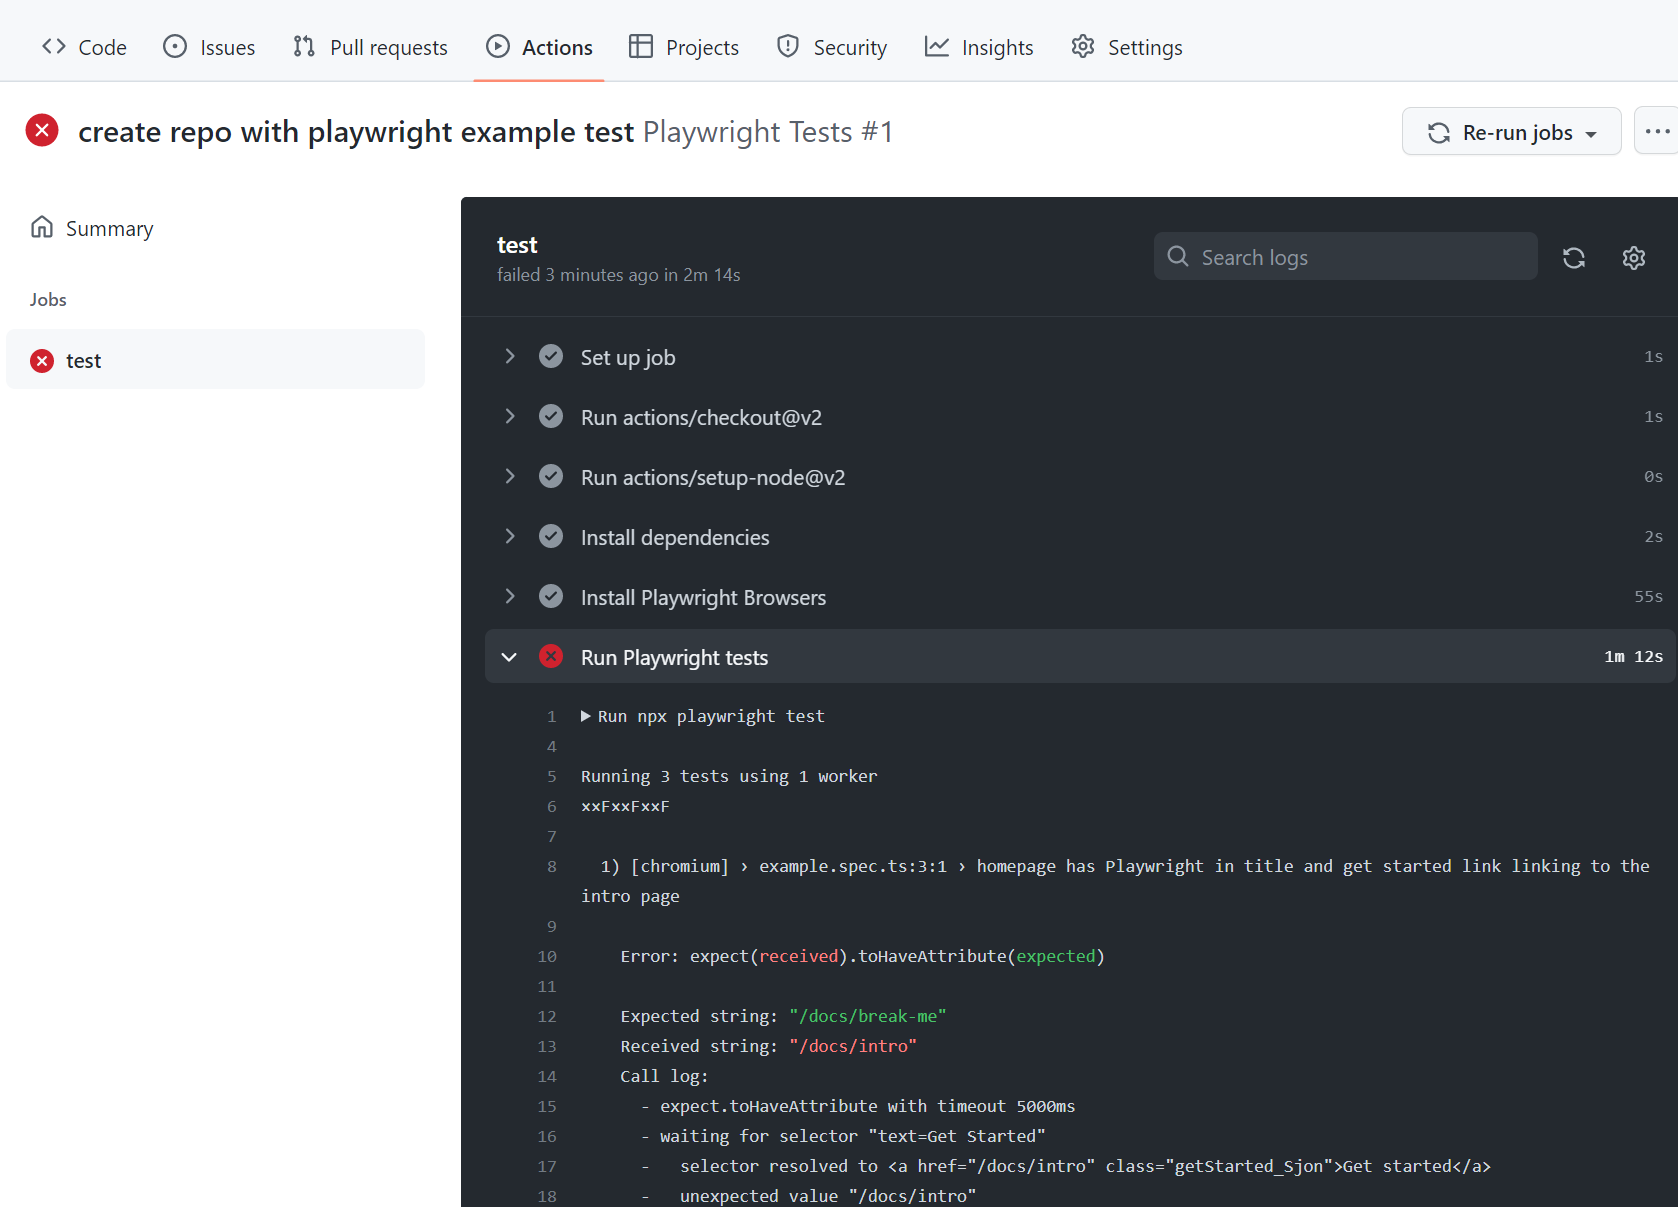
查看测试日志
🌐 Viewing Test Logs
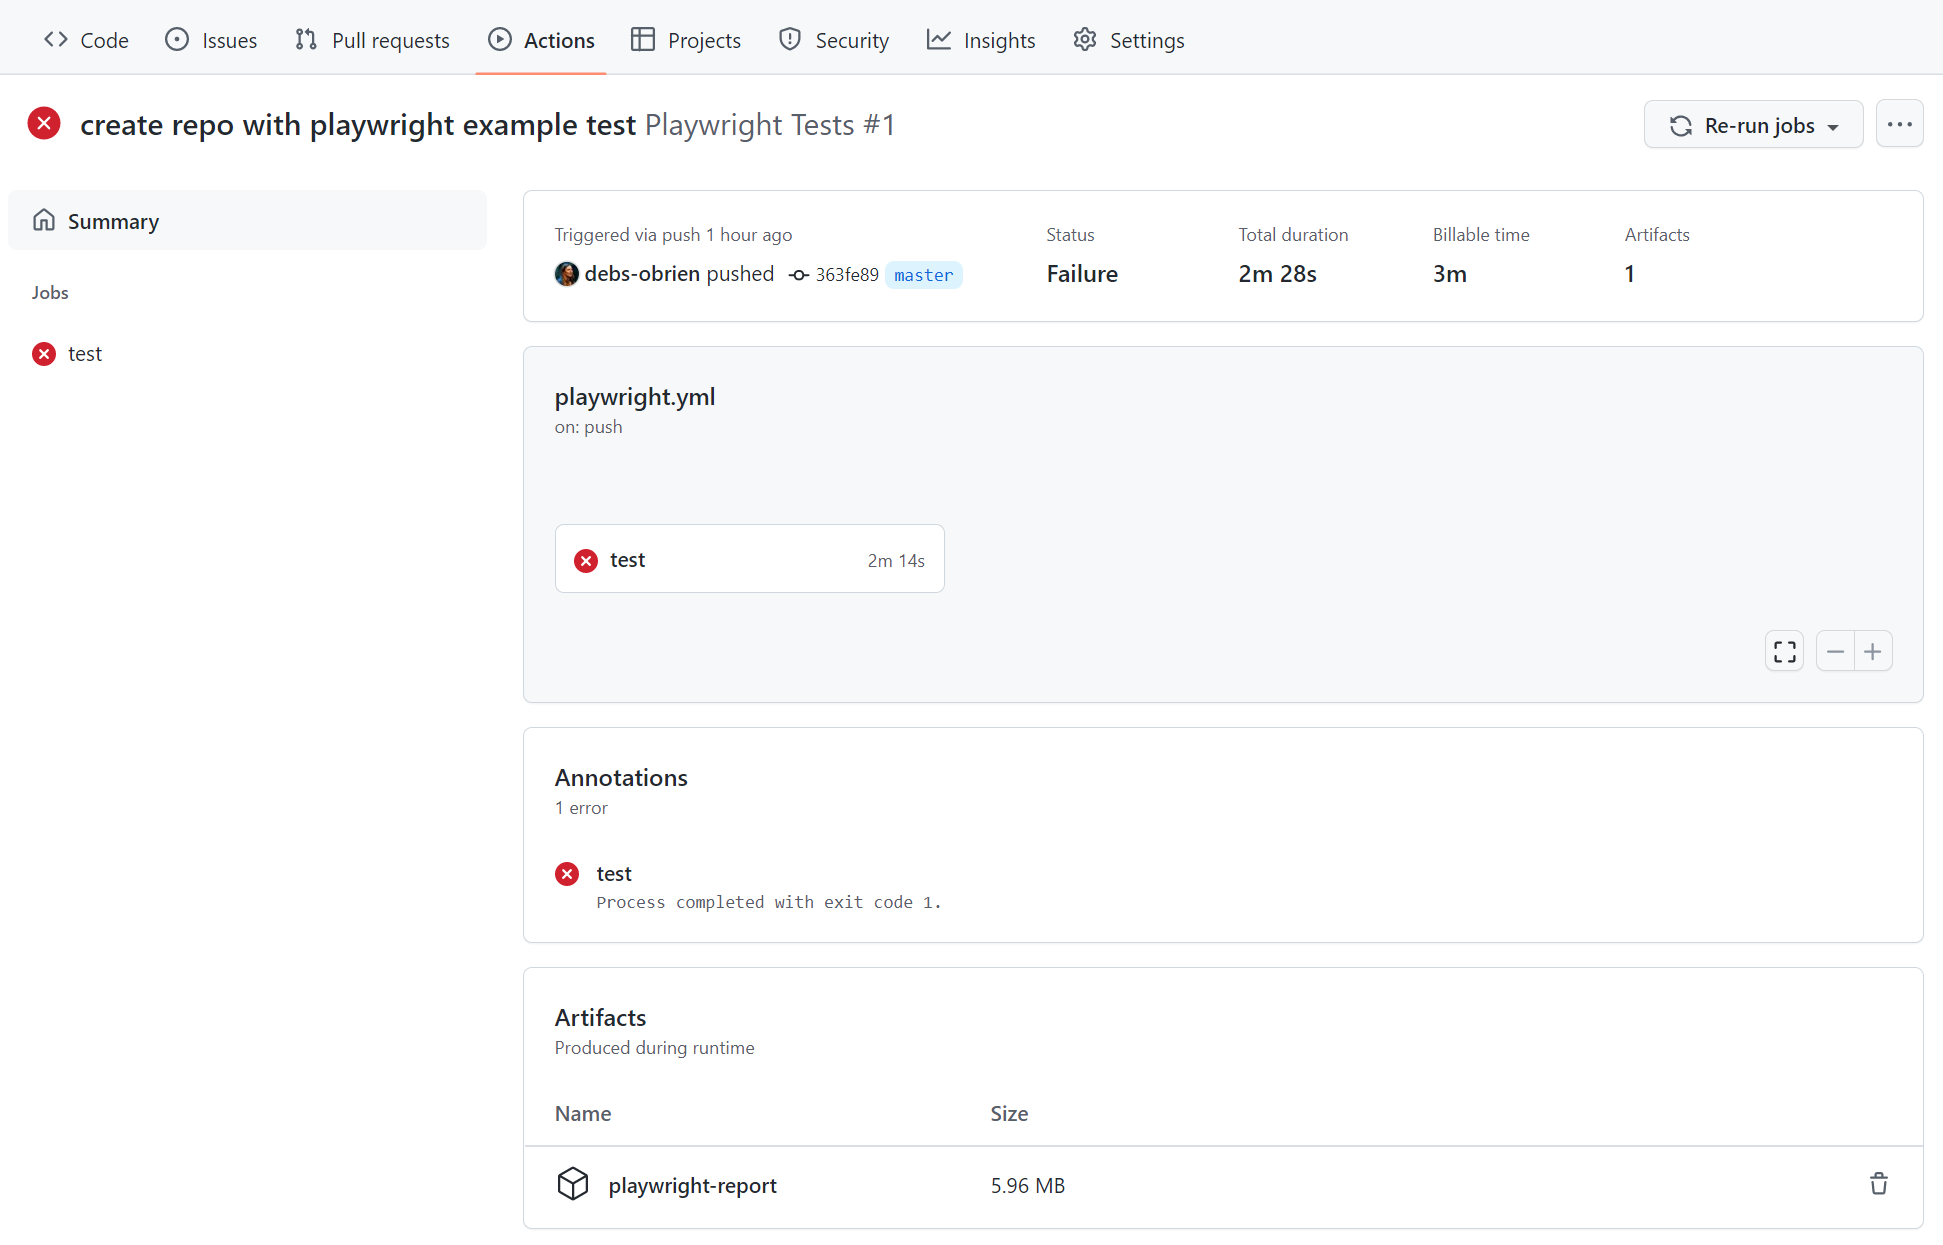
点击工作流运行可以查看 GitHub 执行的所有操作,点击 Run Playwright tests 可以显示错误信息、预期结果和实际接收结果,以及调用日志。
🌐 Clicking on the workflow run shows you all the actions that GitHub performed and clicking on Run Playwright tests shows the error messages, what was expected and what was received as well as the call log.
HTML 报告
🌐 HTML Report
HTML 报告显示了你的测试完整报告。你可以按浏览器、通过的测试、失败的测试、跳过的测试和不稳定的测试过滤报告。
🌐 The HTML Report shows you a full report of your tests. You can filter the report by browsers, passed tests, failed tests, skipped tests, and flaky tests.
下载 HTML 报告
🌐 Downloading the HTML Report
在工件部分,点击 playwright-report 以 zip 文件格式下载你的报告。
🌐 In the Artifacts section, click on the playwright-report to download your report in the format of a zip file.
查看 HTML 报告
🌐 Viewing the HTML Report
在本地打开报告无法按预期工作,因为一切正常运行都需要一个网络服务器。首先,解压缩zip文件,最好放在已经安装了Playwright的文件夹中。使用命令行,切换到报告所在的目录,然后使用npx playwright show-report加上解压后的文件夹名称。这会启动报告,并让你在浏览器中查看它。
🌐 Locally opening the report does not work as expected as you need a web server for everything to work correctly. First, extract the zip, preferably in a folder that already has Playwright installed. Using the command line, change into the directory where the report is and use npx playwright show-report followed by the name of the extracted folder. This serves up the report and enables you to view it in your browser.
npx playwright show-report name-of-my-extracted-playwright-report
要了解有关报告的更多信息,请查看我们关于 HTML Reporter 的详细指南
🌐 To learn more about reports, check out our detailed guide on HTML Reporter
查看踪迹
🌐 Viewing the Trace
在使用 npx playwright show-report 提交报告后,点击测试文件名旁边的跟踪图标,如上图所示。然后你可以查看测试的跟踪,并检查每个操作,以尝试找出测试失败的原因。
🌐 Once you have served the report using npx playwright show-report, click on the trace icon next to the test's file name as seen in the image above. You can then view the trace of your tests and inspect each action to try to find out why the tests are failing.
在网络上发布报告
🌐 Publishing report on the web
将 HTML 报告下载为 zip 文件并不方便。不过,我们可以利用 Azure 存储的静态网站托管功能,在互联网上轻松高效地提供 HTML 报告,所需配置极少。
🌐 Downloading the HTML report as a zip file is not very convenient. However, we can utilize Azure Storage's static websites hosting capabilities to easily and efficiently serve HTML reports on the Internet, requiring minimal configuration.
-
创建一个 Azure 存储账户。
-
为存储账户启用静态网站托管。
-
在 Azure 中创建一个服务主体并授予其访问 Azure Blob 存储的权限。成功执行后,命令将显示凭据,这些凭据将在下一步中使用。
az ad sp create-for-rbac --name "github-actions" --role "Storage Blob Data Contributor" --scopes /subscriptions/<SUBSCRIPTION_ID>/resourceGroups/<RESOURCE_GROUP_NAME>/providers/Microsoft.Storage/storageAccounts/<STORAGE_ACCOUNT_NAME> -
使用上一步中的凭据在你的 GitHub 仓库中设置加密的秘密信息。进入仓库的设置,在 GitHub Actions secrets 下,添加以下秘密信息:
AZCOPY_SPA_APPLICATION_IDAZCOPY_SPA_CLIENT_SECRETAZCOPY_TENANT_ID
有关如何使用客户端密钥授权服务主体的详细指南,请参阅 此 Microsoft 文档。
-
添加将 HTML 报告上传到 Azure 存储的步骤。
.github/workflows/playwright.yml...- name: Upload HTML report to Azureshell: bashrun: |REPORT_DIR='run-${{ github.run_id }}-${{ github.run_attempt }}'azcopy cp --recursive "./playwright-report/*" "https://<STORAGE_ACCOUNT_NAME>.blob.core.windows.net/\$web/$REPORT_DIR"echo "::notice title=HTML report url::https://<STORAGE_ACCOUNT_NAME>.z1.web.core.windows.net/$REPORT_DIR/index.html"env:AZCOPY_AUTO_LOGIN_TYPE: SPNAZCOPY_SPA_APPLICATION_ID: '${{ secrets.AZCOPY_SPA_APPLICATION_ID }}'AZCOPY_SPA_CLIENT_SECRET: '${{ secrets.AZCOPY_SPA_CLIENT_SECRET }}'AZCOPY_TENANT_ID: '${{ secrets.AZCOPY_TENANT_ID }}'
可以通过使用网站的公共网址从浏览器访问 $web 存储容器的内容。
🌐 The contents of the $web storage container can be accessed from a browser by using the public URL of the website.
此步骤对从分支仓库创建的拉取请求不适用,因为该工作流程[无法访问密钥](https://docs.github.com/en/actions/security-for-github-actions/security-guides/using-secrets-in-github-actions#using-secrets-in-a-workflow)。
🌐 This step will not work for pull requests created from a forked repository because such workflow doesn't have access to the secrets. :::
正确处理密钥
🌐 Properly handling Secrets
像跟踪文件、HTML 报告甚至控制台日志这样的工件包含有关测试执行的信息。它们可能包含敏感数据,例如测试用户的用户凭证、访问暂存后端的令牌、测试源代码,或者有时甚至是你的应用源代码。对待这些文件应像对待敏感数据一样小心。如果你在 CI 工作流中上传报告和跟踪文件,请确保只将它们上传到受信任的工件存储,或者在上传前对文件进行加密。与团队成员共享工件时也应遵循同样的原则:使用受信任的文件共享或在共享前对文件进行加密。
🌐 Artifacts like trace files, HTML reports or even the console logs contain information about your test execution. They can contain sensitive data like user credentials for a test user, access tokens to a staging backend, testing source code, or sometimes even your application source code. Treat these files just as carefully as you treat that sensitive data. If you upload reports and traces as part of your CI workflow, make sure that you only upload them to trusted artifact stores, or that you encrypt the files before upload. The same is true for sharing artifacts with team members: Use a trusted file share or encrypt the files before sharing.
下一步是什么
🌐 What's Next